the best orange rolls for kerrygold


Hope you make these for your loved ones this holiday season. Serve warm if you can, they really are magical. xo
This post was sponsored by Kerry Gold butter. You can check out this same recipe I did for them over here. It's my favorite butter in the world and I'm so thrilled to be partnering with them.

The Best Orange Rolls

Most complaints I have about orange rolls are the same complaints I have about everything - it's too sweet. These are not. I mean, I hope by now we've established the fact that "too sweet" will always be something I avoid, but orange rolls, for some reason always have the reputation for being sickeningly sweet and just taste like refined white sugar and flour with the hint of orange. You know?
The magic of these rolls comes from the blend of flours (we have bread flour, spelt and rye). Now, here's the thing, the freshest you can get your flours the better. If a flour smells "sour" when you open the bag, it's old. And yes, grocery stores will sell old flour. If you can get locally milled flour - (don't roll your eyes its totally possible and a thing) - DO IT. It really really makes a difference and is the secret sauce behind every incredible baked good that isn't, well, you know this by now, too sweet.
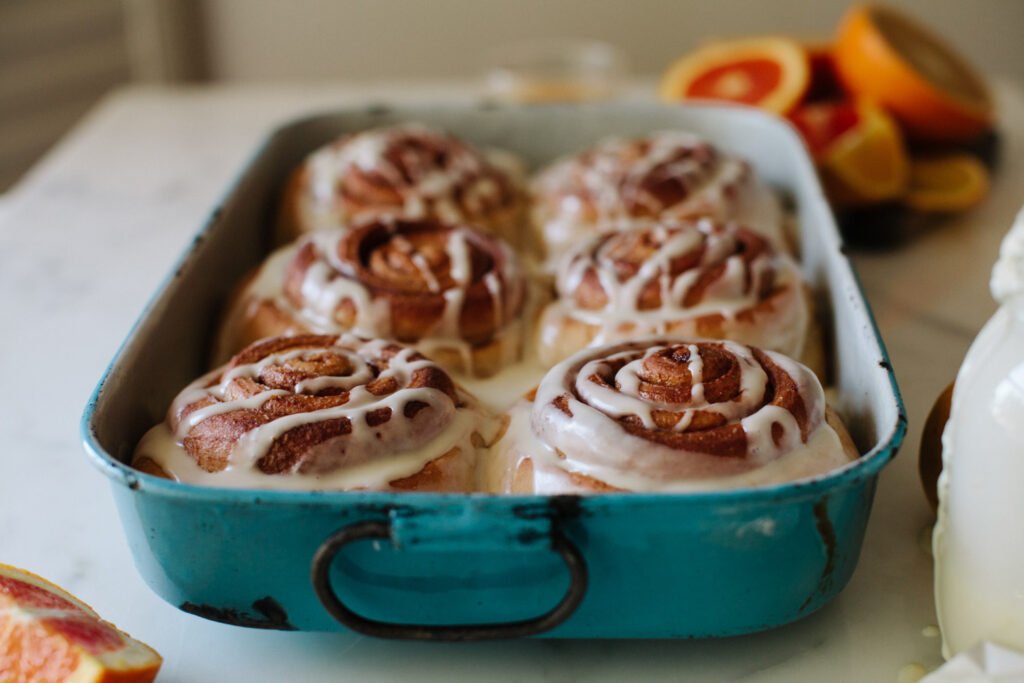
One more thing, if you want these very orangey, add some orange zest to the glaze. I didn't here in the image because I loved the way the rolls looked so much more without the addition of the orange zest, so, I left it out. BUT it really is amazing if you want to add it, optional, but amazing.
for the dough:
½ cup / 113g salted Kerrygold butter
2 cups / 480mL whole milk (about 100 degrees F) (it should be just slightly warm)
½ cup / 100g granulated sugar
1 ¼ teaspoons / 5g active dry yeast (make sure it’s fresh)
5 cups / or 625g bread flour OR combination of: 310g bread flour, 200g fresh spelt flour, 50g fresh rye flour
1 teaspoon baking powder
2 teaspoons / 12g sea salt (1 teaspoon / 6g if using kosher salt)
Zest of one orange
for the filling:
1 tablespoon cinnamon
½ cup / 100g dark or light brown sugar
¼ teaspoon ground cardamom
Zest of 1 orange
Zest of 1 lemon
3 tablespoons salted Kerrygold butter (melted and slightly cooled)
for the glaze:
½ cup / 136g cream cheese (room temperature)
2 tablespoons / 40g sour cream
3 cups / 360g powdered sugar, sifted (no lumps!)
¼ cup to ⅓ cup / 59ml fresh orange juice (maybe a little more or less, depending on how thick and tangy you want the glaze)
1 tablespoon fresh lemon juice
1 pinch sea salt
Zest of one orange (optional)
1 tablespoon Kerrygold butter (melted, for an even thinner, more rich glaze but this is optional)
Tips on making a really good orange roll: (Please read this first!)
In bread making there are usually two rises, the first rise and the second rise.
The first rise takes place when our dough is a big ball of love - this is the first chance the yeast gets a chance to work and make that dough ball double in size.
The second rise happens after our rolls have already been formed. Meaning we have our beautiful swirls in the pan and we’re just waiting for them to grow again.
In this recipe, 2nd rise is significantly shorter than the 1st rise. (a few hours vs. 4-8ish hours)
I feel like knowing this right off the bat can really help you understand how to make a proper orange roll.
A word about making ahead:
After the first rise, this dough can rise / be stored in the fridge for up to 3 days.
For me, I have found it best to let the dough rise overnight at room temperature, and then form the rolls and let them rise again (for their second rise) in the morning OR my preferred method: Let the dough rise in the daytime (since it’s warmer in the day it can double in size faster than 8 hours) and then stick it in the fridge at night so you’re rolling out cold dough in the morning. This dough is way easier to roll out when cold.
Glaze can be made up to 5 days ahead of time, kept refrigerated and tightly sealed.
for the dough:
Butter and grease a large bowl or very large plastic container with a lid and set aside.
In a large bowl, whisk together warm milk, melted butter and sugar. Add yeast, and set aside.
In a separate large bowl, mix flours, salt and baking powder.
Make a little well in the middle of the flour mixture and the liquid mixture: milk/ butter/ sugar / yeast.
Add orange zest.
Mix and knead the dough in the bowl for a few minutes until it comes together and it’s entirely incorporated.
Place dough in a buttered bowl or large plastic container let it rise for 4-8 hours, or until doubled in size. I prefer to make this dough in the morning, let it rise in the day time and then stick it in the fridge once it’s doubled in size. That way, when I roll out the dough in the morning, it’s cold and much easier to work with.
Using a rolling pin, and well floured surface, roll dough out into a rectangle. (I never measure this part, But dough should be anywhere from ½ inch to 1 inch in thickness or somewhere in between. Don’t stress about this too much.)
Rolling the dough out always requires some light pulling and stretching with your hands + in addition to the use of the rolling pin. I actually find this bit the most frustrating as the dough is so elastic, it tends to jump right back into a smaller shape as soon as I roll it out - this is especially true if I’m working with warm dough! Cold dough here is best! Trust me! But just keep working with the dough, it may take you a few minutes, but it will roll out and eventually form a rectangle. Don’t worry. Just check it to make sure it’s an even height on all sides. (I like my dough about ½ inch)
for the filling:
Melt butter and let it cool. Set aside.
Combine all ingredients, except the butter in a small bowl.
Once your rectangle is formed, paint melted butter on and evenly sprinkle the cinnamon + sugar + orange zest mixture.
Roll dough up forming a spiral + log. I usually roll with the smallest part of the rectangle onward (see pics). If you’d like smaller rolls (and not huge rolls like I’ve made here), stop mid-roll and cut straight down the middle. (See pics for reference.) I think huge rolls though, are really fun for this.
Slice your spiral log with a very sharp knife or with some fine bakers twine or string (non-minty dental floss works well too). For large thick rolls, cut each roll about 3” in width. If you’d like smaller, more shallow rolls, cut smaller (so 1 to 2” in width).
Butter one 9 x13” pan and one 8 x 8” pan and place rolls in pans. (For me, I fit 6 huge rolls into the 9 x 13” pan, and have one roll left over, and put that one in the 8 x 8 pan).
Cover with a light cloth / paper towel and let the rolls rise a second time. Should take 1-2 hours or until rolls have doubled in size and they’re nice and plump. (Try to keep the rolls in a some-what warm-warm-ish space for this second rise).
Bake rolls, one pan at a time at 360°F /182°C for 18-25 minutes. Baking time depends on the size of your rolls - and how doughy you’d like them - but they should be nice a golden brown all the way all over the top.
Let the rolls cool for about 5 minutes, then drizzle with orange glaze while still warm, so it gets into all the nooks and crannies.
Enjoy immediately! Orange rolls are best eaten within a few hours of being baked.
for the glaze:
Beat cream cheese and sour cream in an electric mixer until smooth.
Scrape down the sides, on a stir setting add the powdered sugar slowly, gradually increasing the speed until it's all incorporated.
On very low speed, add orange + lemon juice slowly, until you’ve reached your desired thickness. The more juice you add, the thinner and more tangy the glaze.
Stir in zest and pinch of salt.
Glaze can be made 5 days ahead of time, stored tightly sealed in the fridge.
Makes 6 huge rolls, in a 9 x 13” pan, with one roll left over to bake separately (7 huge rolls total)
I love blending different kinds of flours here because orange rolls for the most part, can be so overwhelmingly sweet. These feel a bit wholesome without really even knowing that they’re wholesome. Nobody even notices the different types of flours as much as they notice that they’re just phenomenal. (Can I say that about my own rolls?) The magic of these rolls is all in the glaze, it’s slightly tangy and citrusy - and even though we use orange zest in all three parts of these babies (the dough, the filling and the glaze) the glaze is just the microphone to help them sing a little louder.
Time saving tips: You can easily make this dough 2-3 days ahead of time, and store it tightly wrapped in the fridge. We keep our dough in a plastic container with a fitted lid. You can make the glaze up to 5 days ahead of time too.