vanilla bean marshmallows {and a public moment}

We had a public moment the other day.
As in my toddler son started screaming from the top of his lungs because he wanted me to buy a “wee-ah weee-ah” (firetruck) from the toy store.
The “no” resulted in throwing a wiggly tantrum (you know the kind where it’s impossible to pick them up? We also call this "going boneless") which turned into hyperventilating-like breaths which turned in to broken sentences and me considering celibacy.
My mom was with me (bless you mom) but my son only wanted ME to hold him while he worked through his feelings.
So there I was, escaping the store going up the escalator in a mall with people who have ears and eye balls, my baby girl strapped to me, my hip exaggerated to hold my toddler son up without squishing baby girl and looking like "Oh wow, she's got her hands full!" (By the way, people of the world - please stop saying this to moms, like, it's the worst. We know okay? It's like saying oh wow! You have kids! Like it's just as rude to me as saying - Wow! You don't have kids! Puhlease stop it.)
As we rode up the escalator, another woman rode down on the parallel side, eyeing my chaos and arms full she gave me a wink and said, “Bravo.”
It was a movie moment.
One of those perfectly placed - proof that God is with us and He has a sense of humor - moments that made me laugh and feel relief and re-consider my internal declaration of celibacy.


My son through a tantrum for another hour (did you know an hour = 10 hours in mom life?) but finally FINALLY shaped up and turned from tiny red Tasmanian devil to sparkly angle figurine while I went through a very long return at "mommy's store" which took about another hour.
In fact he was so well behaved that the memory of the tantrum was gone and as we left "mommy's store" I said, “You were so good my boy! Let’s go get that weeah-weeah.”
Insert shoulder shrug emoji here. #pleasedon’tjudgemyparenting
These early days of motherhood are like a mallow in a mug - all consuming, leave little room for anything else and don't make sense.
But worth it.
So, it may not make sense for me to rave about marshmallows after Christmas, but you need this marshmallow (or as my son says, “marmeeeeelow”) recipe for your life (full stop). Also, see reference about said marshmallow in a mug, motherhood and not making sense. It fits. Barely.
Cheers to more public moments. No matter how big or small. And maybe, just maybe the next time you see a mom "with her hands full" we can say "bravo", instead of you know, that phrase I hate. It'll mean a lot more than you think. ;)
Love you friends. xo

vanilla bean marshmallows (and a coffee version too!)
If you don't want to read on, just know these are the best marshmallows I've ever had and the best marshmallows I've ever made. Wait, one more thing - please read this recipe in it's entirety before making them. Marshmallows probably seem like one of those things you’re never gonna make. But trust me, they’re SO much easier than they seem. The trickiest part is heating up the sugar syrup stuff and then pouring that hot sugar syrup stuff into our electric mixer. Once we get past that fear, you’ll never go back to store-bought mallows again. Well you might, buuuuuut they'll never be as amazing as these. Promise. (ps. Not to toot my own horn (haha toots) my hot cocoa would go perfectly with this: https://sweetish.co/bittersweet-easy-hot-chocolate/)
1 ½ cups / 333g warm water (like what you'd bathe a baby in temperature, you should barely be able to feel the "warm" on your wrist)
¼ cup / 40g powdered gelatin
2 ½ cups / 500g granulated sugar
1 cup / 319g organic corn syrup (try to really use organic here, organic means non GMO )
½ vanilla bean (split and scrapped, optional. If you don't have a vanilla bean you can use vanilla bean paste - just use about 1 tablespoon)
2 teaspoons vanilla extract
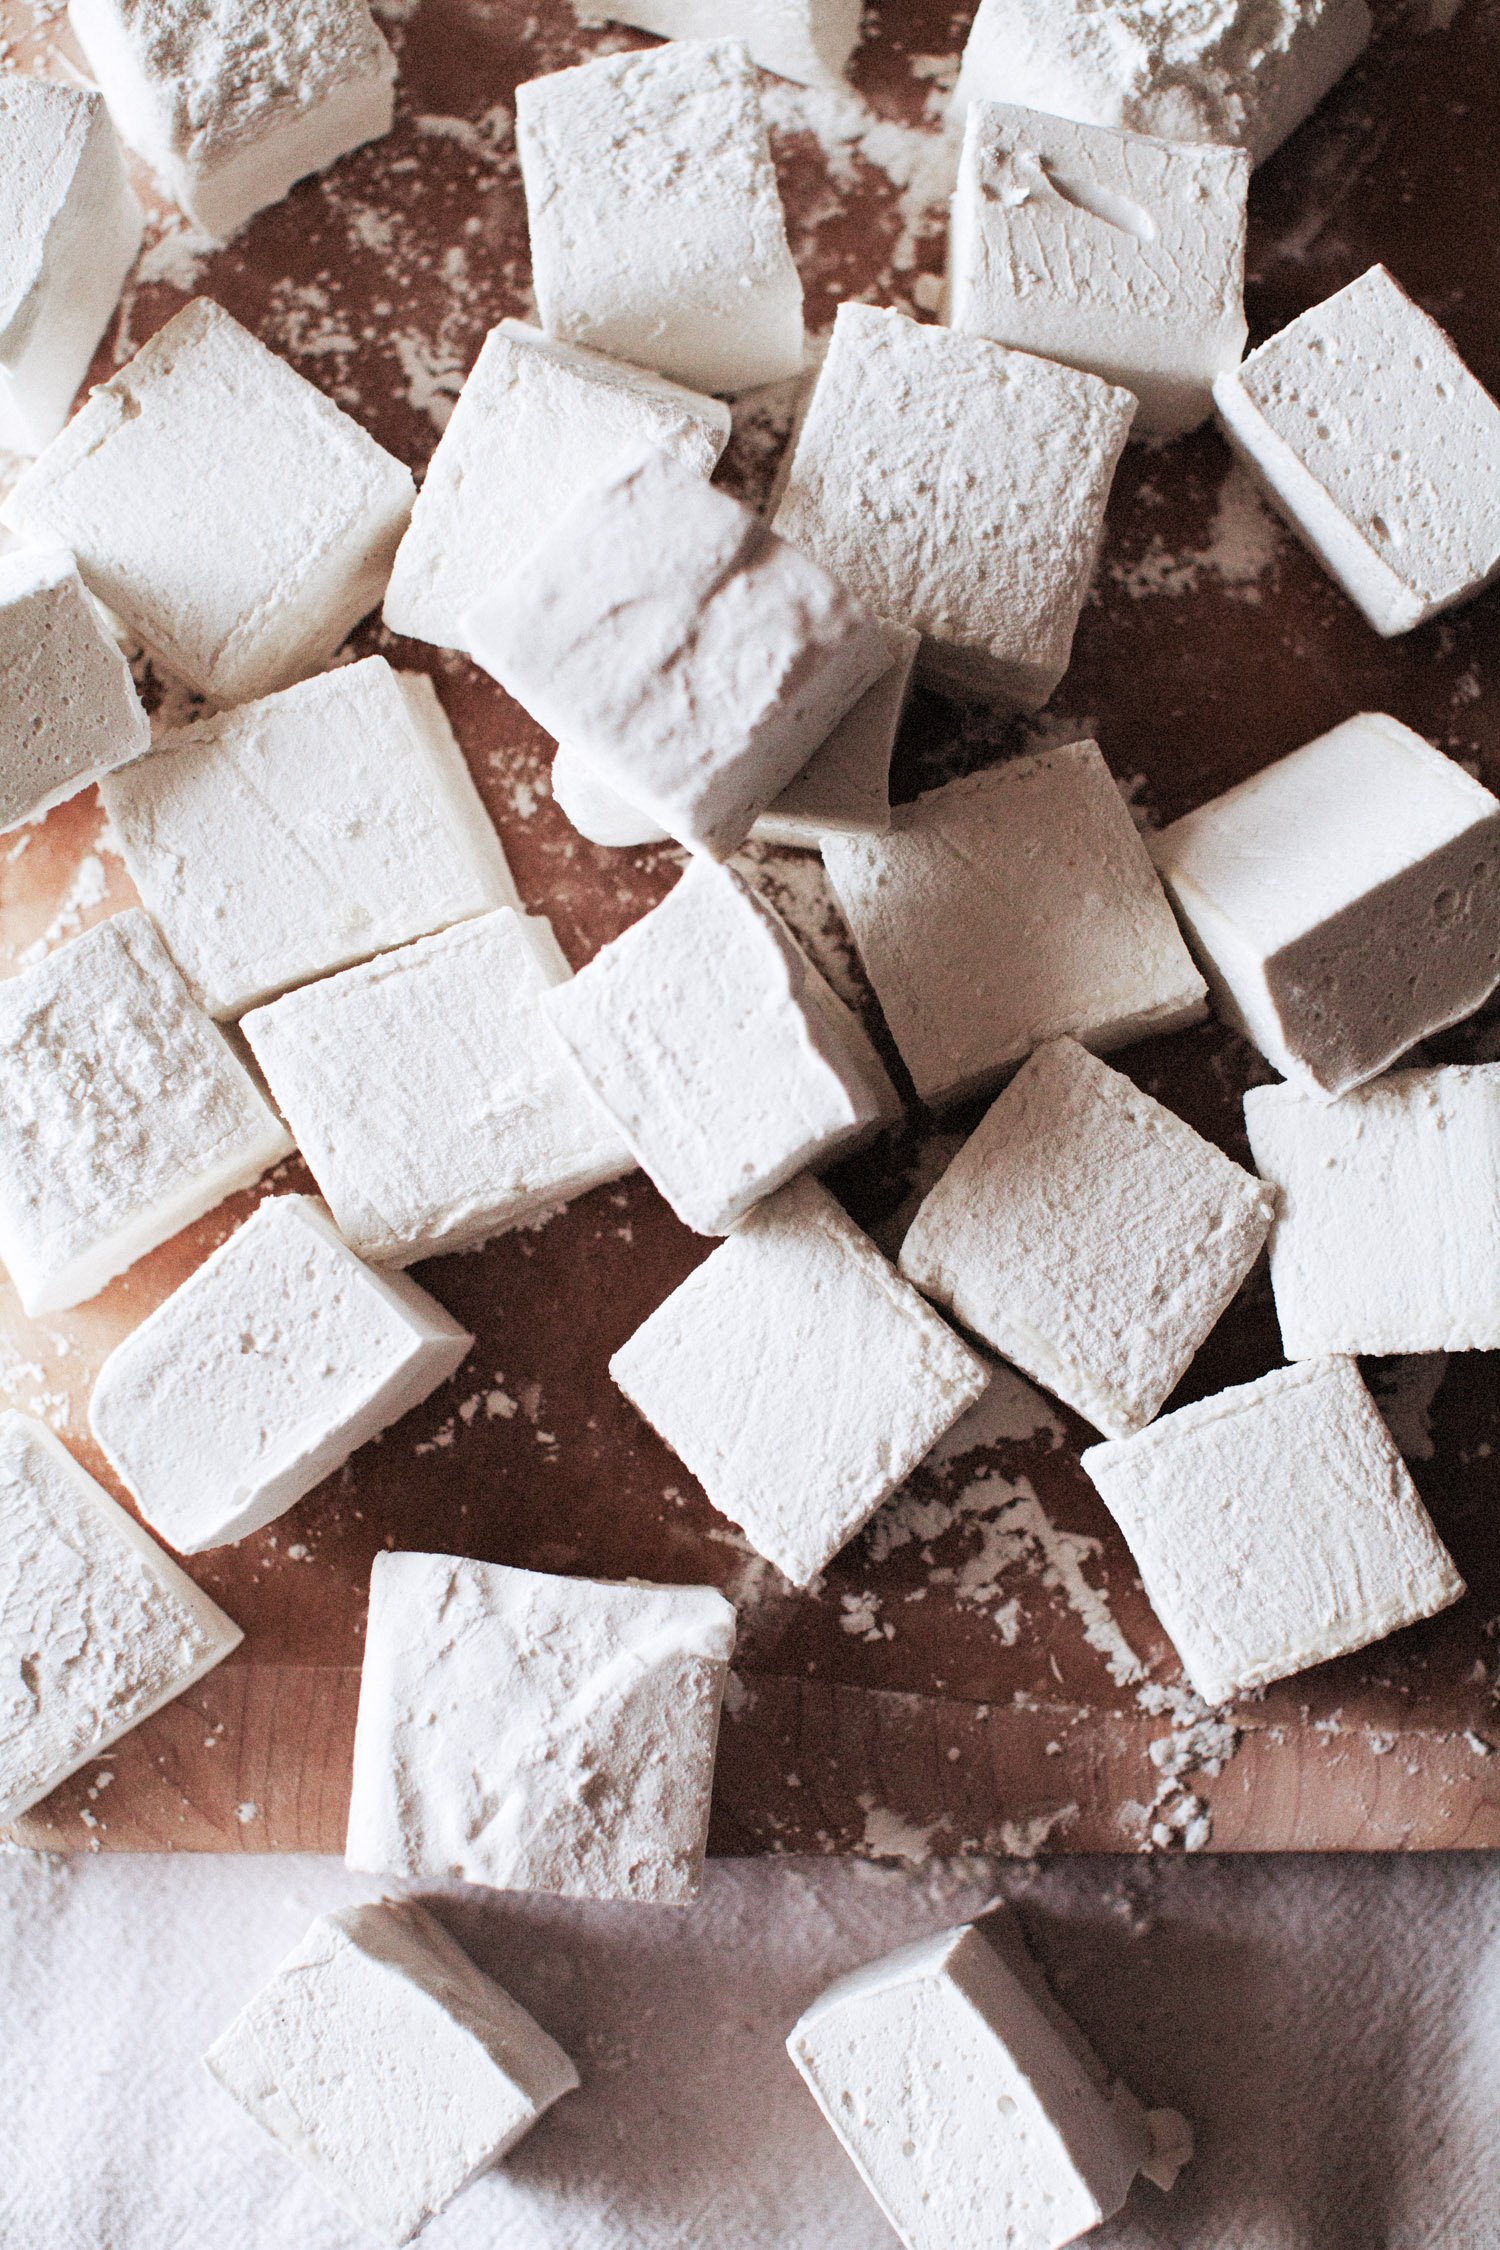
¼ cup / 31g powdered sugar (and a little extra) (this is for coating and cutting our marshmallows only)
¼ cup / 28g organic cornstarch / cornflour (and a little extra) (this is for coating and cutting our marshmallows only)
¼ teaspoon kosher salt (increase to ½ teaspoon if using sea salt)
Salted organic butter for greasing (or coconut oil) (i like using pale, salted butter here cause the salted butter gives an extra "umph" to the mallows)
To make a batch of coffee mallows (these are HAPPINESS in hot cocoa) you’ll need:
3 tablespoons espresso powder (divided, 1 tablespoon and 2 tablespoons)
In the bowl of an electric mixer pour in ¾ cup (167g) water and all the gelatin. You don’t really need to do anything more, just stir it with a spoon real quick and make sure all of the water is being absorbed by the gelatin (so there is no dry gelatin). Let the gelatin absorb the water or “bloom”. (Blooming = gelatin expanding and absorbing the water). *If you’re making the coffee version of these mallows, add 1 tablespoon ground espresso at the same time water.*
bakers note: Don't freak out if your gelatin water mixture is all lumpy and weird. It's gonna be fine. The hot sugar is going to melt it all soon anyway so no stress! ;)
In a heavy bottomed dutch-oven type pot (think a cast iron enamel coated le creuset type pot), over medium-low heat, melt together: sugar, water, corn syrup until the mixture comes to a low steady boil/simmer. Keep the candy thermometer attached to the side of the pot (but not touching the bottom of your pan) and let the mixture mildly bubble until it reaches 240 F or the “soft ball” stage. This may take up to 6-10 minutes to achieve, but don’t leave your mixture, watch it.
bakers tip: You don’t want your heat too hot OR too low here, so watch your sugar and adjust accordingly - make sure your sugar is just this steady low simmer / bubble and doesn’t go cray cray.
This is the part where you have to be really careful: Turn your electric mixer on the lowest setting it can go. The lowest. If yours can’t go super super low, leave it off for right now. (Low = like a very slow, glacial stir).
Once the sugar mixture reaches 240 degrees F / 115.5 C, cover your hands with oven mits (both of them!) and remove the sugar mixture from the heat and gently pour it into your electric mixer bowl filled with the gelatin. If you're feeling brave, turn the speed on the lowest possible speed ever (on my electric mixer it's called "stir."). Pour in a slow, steady stream taking care not to splash any of the hot liquid on yourself. I find that if you let the hot liquid hit the side of the inside of your bowl first and stream in from there - there’s less “splashing”. (You don’t want ANY of your children around while doing this part you guys.)
Continue to pour all of this lava-like sugar in very slowly. (If you haven’t turned on your electric mixer to the lowest mixing setting yet, now is the time to do it.)
Add pinch of salt and vanilla right after you've poured in all of the hot sugar mixture. *If making a coffee version of this recipe, add the extra 2 tablespoons of the espresso powder here too.*
Slowly speed up the speed of your electric mixer - do this once all the liquid is poured in and you've had it on low speed for about 30 seconds. Whip this mixture until it starts looking like a fluffy white cloud - and the outside of your mixing bowl is barely warm (like a hair above room temperature) - about 8-10 minutes. (just watch it - this time could vary slightly). Don't stress if you need more time whipped the mallows together, or less time. But try to err on the side of whipping enough - cause it's hard to over whip these!
bakers tip: When the mixture is really white, thick and fluffy and the outside of the bowl isn’t too warm to the touch anymore, it’s usually done. The mixture should appear VERY thick, and VERY sticky. It should resemble marshmallow fluff - not whipped cream. If you've got whipped cream - whip longer, it needs more air into it.
In a separate little bowl, sift together cornstarch + powdered sugar. Try to make sure there are no lumps in the mixture. (If there’s lumps - they’ll make little divots in your marshmallows when all is said and done. Not a huge deal, but still, you’ve been warned.) Feel free to sift the two ingredients together to get rid of the lumps.
While your mallows are whipping - prepare a 9 x13” baking pan (the higher the sides on this the better) by coating it with salted butter or coconut oil (I prefer butter) and then sprinkling in a generous amount of powdered sugar + cornstarch mixture. Don’t use all of the mixture here, you need to save some for later. (Also if you're finding you need more of this stuff, by all means use more.)
bakers tip: You don’t need to slather the pan with butter to thickly - just enough to get the powdered sugar + cornstarch mixture to stick. Use about ¾’s of the sugar + cornstarch mixture to coat the bottom and sides and corners of the pan. You want a generous coating so the marshmallow mixture comes out fairly easily. You can dust the excess off of the marshmallows later.
Once the mallows have reached the right consistency (see my baker’s notes above). Grease a bowl scraper (linked below) or a large flexible spatula with butter or coconut oil. Scrape the sticky-cloud-like mixture out of the mixing bowl and into the 9 x 13” baking pan. This is a little tricky, but the faster you can work here the better as the marshmallows tend to dry quite quickly. Scrape, pour and press the mallow mixture into the baking dish as quickly as you can, spreading it around evenly as you can.
bakers tip: It helps to have your bowl scraper or spatula completely buttered, and your 9 x 13" pan completely ready before your marshmallows are done. (Prepare them as the mixture whips!)
Let it set for about 4 hours. If you’re leaving the mallows out longer than 4 hours, cover with plastic wrap.
Sprinkle the rest of the cornstarch + baking powder mixture on top of the set mallows, evenly.
Then dump the mallow-filled baking pan over onto a cutting board. (You might need to go around the edges of the baking pan with a buttered knife to get the marshmallows to come out if they don’t come out easily.) Once the marshmallows are out, cut them into large squares with a sharp, buttered chef’s knife. The sharper the knife the better. I like to score the top of the big mallow slab first - so I know exactly where I am going to cut my marshmallow shapes. *ps make sure your knife is buttered as it will help you cut the marshmallows with much more ease.
Marshmallows will keep for about a month in an airtight container kept in a cool place.
For my hot chocolate recipe go here. (you wonderful people have consistently said "it's the best hot cocoa you've ever had.")
bakers tips: You’re gonna need a candy thermometer. It’s annoying, but once you have one it opens you up to the beauty of making mallows. I use this one.
time saving tips: Mallows can be made a days and days in advance - and kept up to month in an airtight container at room temperature. If you live in a super humid area though - probably best to keep these in the fridge. The humidity from the air can make them gooey. (Like if you live in Hawaii, please keep them in the fridge.)
recipe adapted from: Little Flower Bakery Cookbook